How to Set Up and Send a Campaign in CXT to Your Contact List
Prior to creating and sending a campaign in CXT, ensure your contact lists are prepared. For detailed instructions, see the article How to Set Up a Contact List in CXT.
Once your contact list is configured, you can proceed to create and send an SMS campaign.
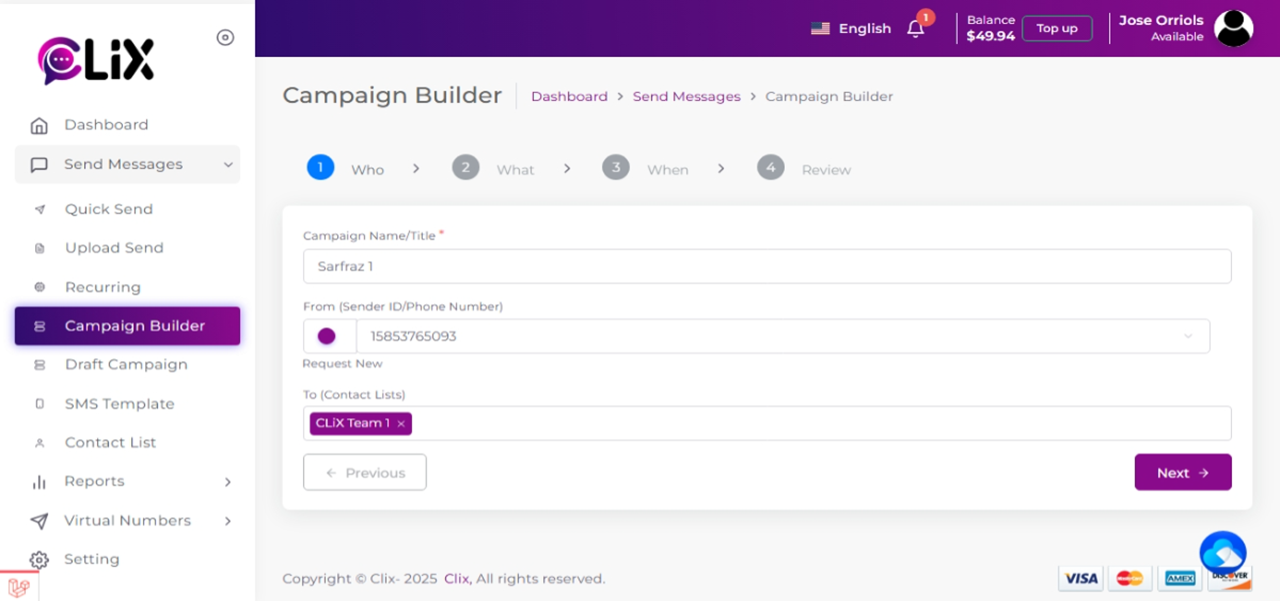
1. Then go to ‘Send Messages’ in the left side panel of the dashboard. Then click ‘Campaign Builder‘.
Campaign creation is organized into four key stages: Who, What, When, and Test & Review.
2. Go to the Campaign Name/Title field and choose and existing campaign form the drop down list of templates.
3. Then go to the ‘From’ field and select your registered number from the list of one or more numbers assigned to your account. This is the number that will show up on your recipients mobile phone.
Reminder: Replies from recipients are supported only on virtual numbers, verified numbers, and shared numbers.
4. Then go to the ‘To’ field and select and from the list of existing Contact templates. Then click ‘Next’
Reminder: If you didn’t set up a contact list before launching your campaign, select “Forgot to create a group?” to create one now. For step‑by‑step guidance, see the article How to create a contact list in CXT.
Reminder: To import contacts from a file, select “Need to import contacts from a file?”. For detailed guidance, see How to upload a file of contacts to CXT.
What
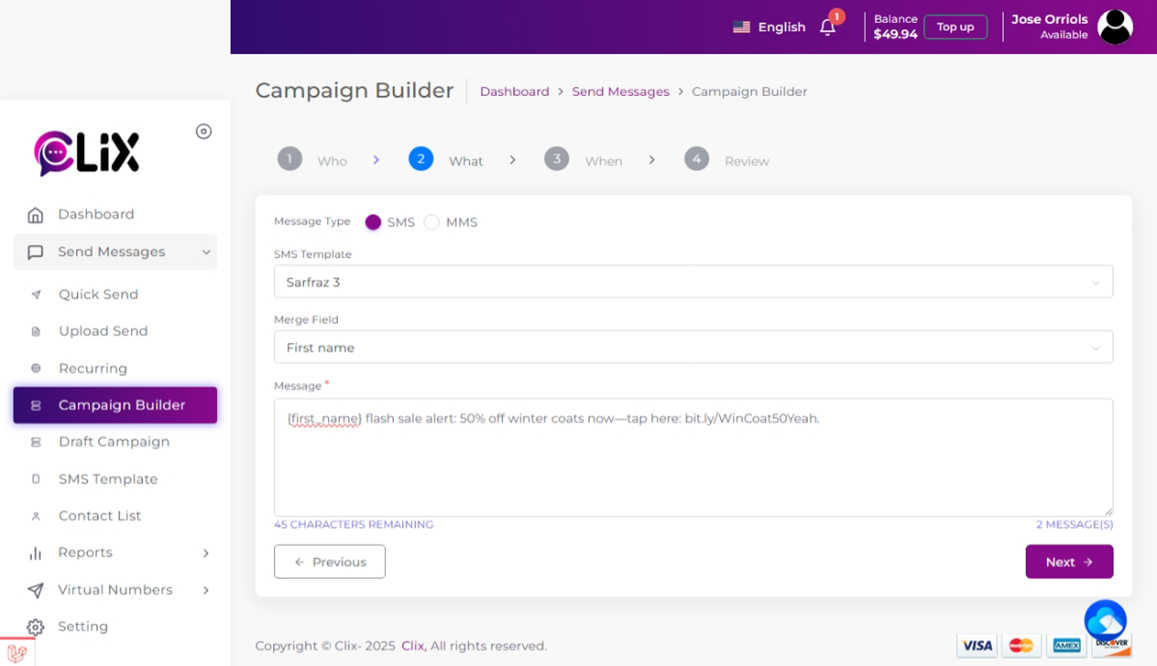
5. Once you in the “What’ section, you can choose an existing SMS template in the SMS Field.
6. Alternatively you can type your message in the ‘Message’ box.
7. You can customize your message using Merge Fields by selecting them from the ‘Merge Field’ drop‑down menu. These fields automatically pull in contact details such as Phone, First name, or Last name. The information must be included in your imported group contact excel file.
8. Then click ‘Next’ to continue.
When
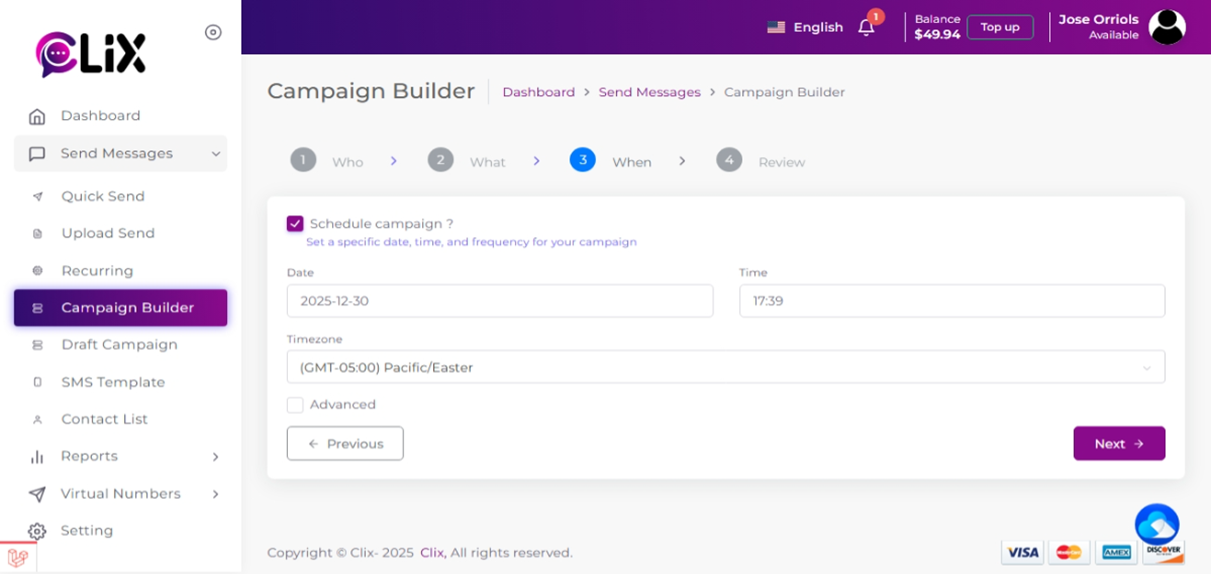
9. You’re ready to launch your campaign. From here, you can choose two sending options:
- Send it now : Sends the campaign right away
- Send it later : Sends the campaign at the predefined date and time.
Review
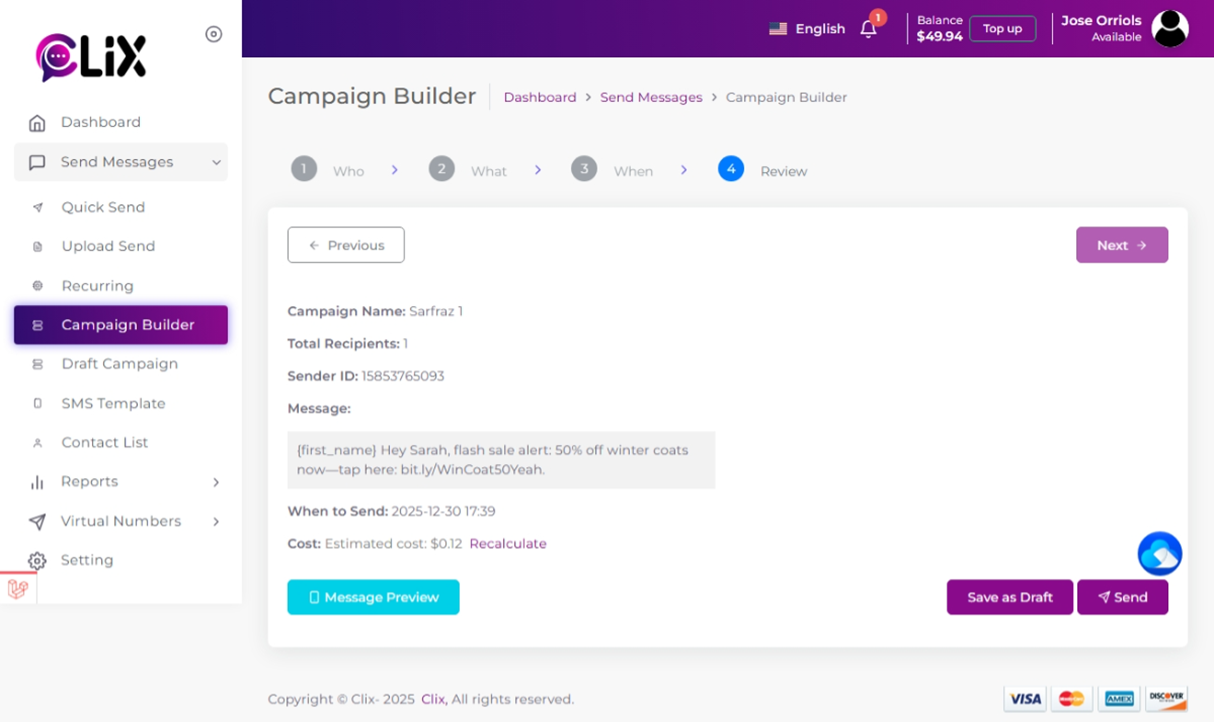
10. Review that your campaign details are correct by clicking ‘ Message Preview’ and if you're pleased and ready to send, simply click ‘Next’ to send your campaign or save it for later by clicking ‘Save as Draft’ to come back to your campaign at a later date.